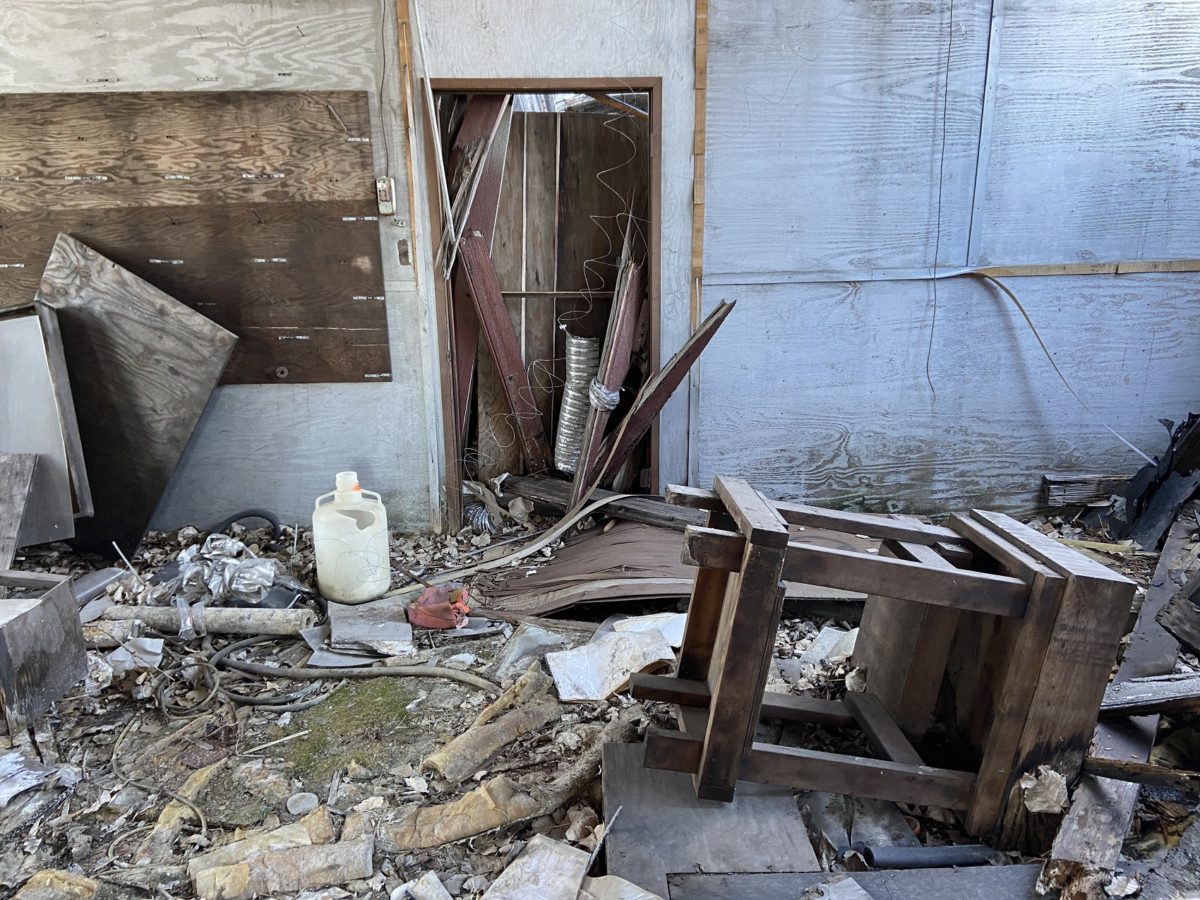
I first discovered this item in the BP office weeks (or months?) ago. It was tipped over and right in the middle of the room, resting on it’s side. I wasn’t shocked that some animal had felt the need to kick it over, but it did seem odd it was in the middle of the room. Did someone move it there before they knocked it down? Mysterious to be certain.
It was only a couple weeks ago that I decided I might like to bring it home. I could tell even before I set it upright that it was of a very sturdy construction. It was also a familiar style, as I have built similar items myself.

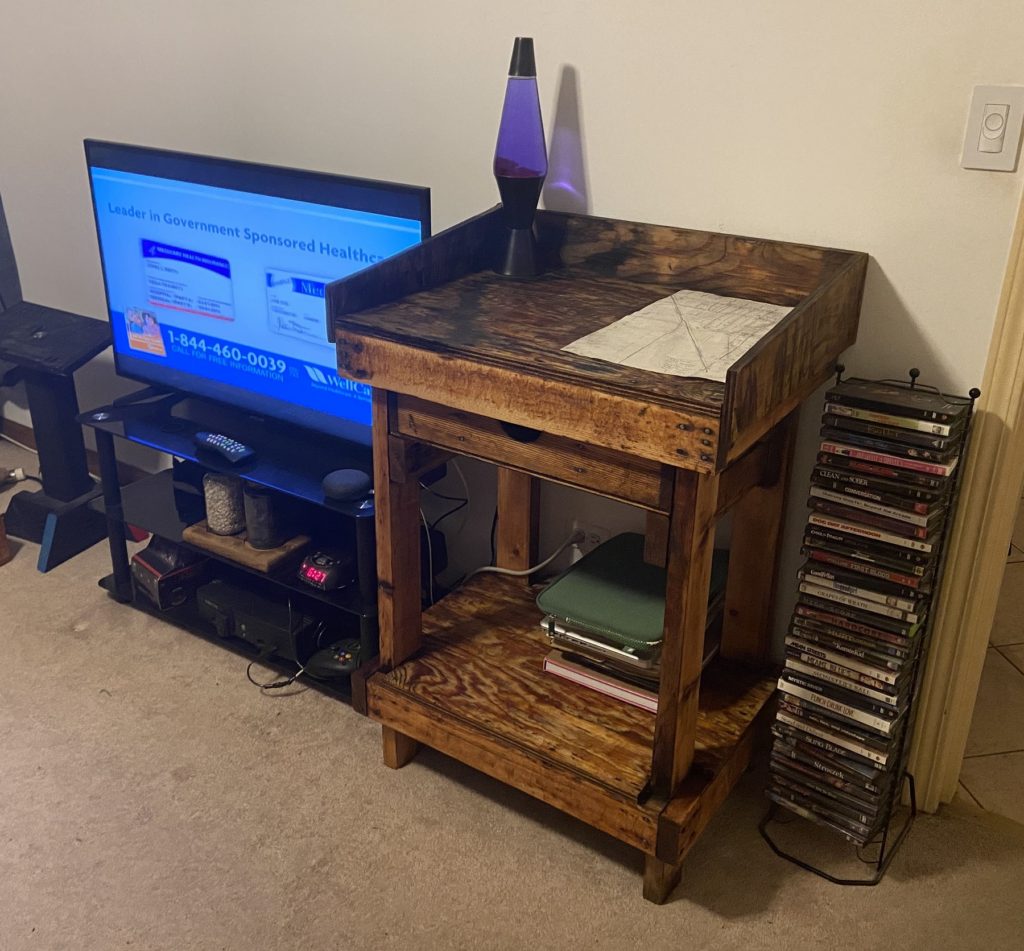
I built this small table specifically to free up what little counter space I have, and move my microwave to the corner. I used salvaged materials, mostly from pallets and painted it blue. It has been in service for a number of years and that won’t be changing anytime soon. However, I must admit some of the construction is a bit ramshackle. Whoever built this standing desk in the by-products plant was very careful to cut everything square. I especially admired how well they perfectly notched the plywood for the bottom shelf out for the four legs. The drawer as well is very elegant, with a perfect half round to open it and a nice set of dividers inside. There are even small ‘stops’ screwed to the sides so you don’t yank it out and smash your toe. It has a ‘flange’ on three sides to keep your pencil from rolling off the edges, two of which are nicely beveled. One of those was damaged from the fall it took, the nails were partially pulled out and there was some water damage to that end from sitting on the earth for so long.

I carried it from BP to ovens one weekend, then the next brought it to the fence line at Torrence Ave so I could come back and pick it up with my truck. I got it back home and immediately brought it into my shop to warm up and thaw out. I was able to pry the damaged side off fairly easily and removed all the nails. I saved one so I can find very similar replacements. I scraped off all the dirt that had accumulated on that side from likely years laying prone. After that – I had to walk away. I know there is no sense in trying to sand or work on the finish until it has really gotten warmed up and dried out. The piece of plywood I removed has some delamination from where the nail bent and pried it apart. Once it dries, I can re-glue that and clamp it shut.
After letting it sit to dry for 48 hours I realized I had made a dumb mistake. I placed the removed flange on top of the desk to dry out but put the wet side (the side that was on the ground) against the desk. So it did not dry hardly at all and left a big condensation mark on top of the desk. So I set it in a better place to dry (on it’s side). The next day I started with the 50 grit on my belt sander to remove the black coating. I think this is oxidized wood combined with some kind of filthy grease or just dirt. Bear in mind that the foundation for the BP office has sunk into the earth so that building essentially has a dirt floor now. After that I did some fine tuning with 120 grit on the orbital sander. I didn’t initially plan to remove the drawer but when I saw the stops were held with screws (only nails are used elsewhere) I did take it off. Here is what it looked like after Monday afternoon. The natural color of the wood is finally revealed! Once I was done I moved it into my office to get even warmer (you can see the removed plywood flange, still unsanded, on it’s side).

More sanding….and more after that. Followed by three applications of linseed oil, 24 hours apart. And now – it is done! The style and editing of this video is a tribute to a YouTube channel I really love – check it out.