My TQI bulletin board and my suggestion box were found on different dates but are inextricably linked by their original intended use. So finding duplicates of both was quite a thrill – and yes, I had to take those too. So I’ll just say it one time, for the record, as clearly as I know how. If I find 100 of each, I’ll just take those too, and restore all of them, and rent a warehouse to store them. Full stop!
- Suggestion box recovery
- Electrical shop
- April 30 2021
- TQI board recovery
- Coal bunker
- January 15 2022
- Suggestion box #2 discovery
- Coal bunker
- January 15 2022
- TQI board #2 discovery
- BP office
- February 19 2022
- Suggestion box #2 and TQI board #2 recovery
- February 26 2022
And there is the brief history of these items. So I set out on a winter Saturday to recover both. I had already done the recon to inspect what type of fasteners were used to fix these to their respective walls and appropriate tools were packed.
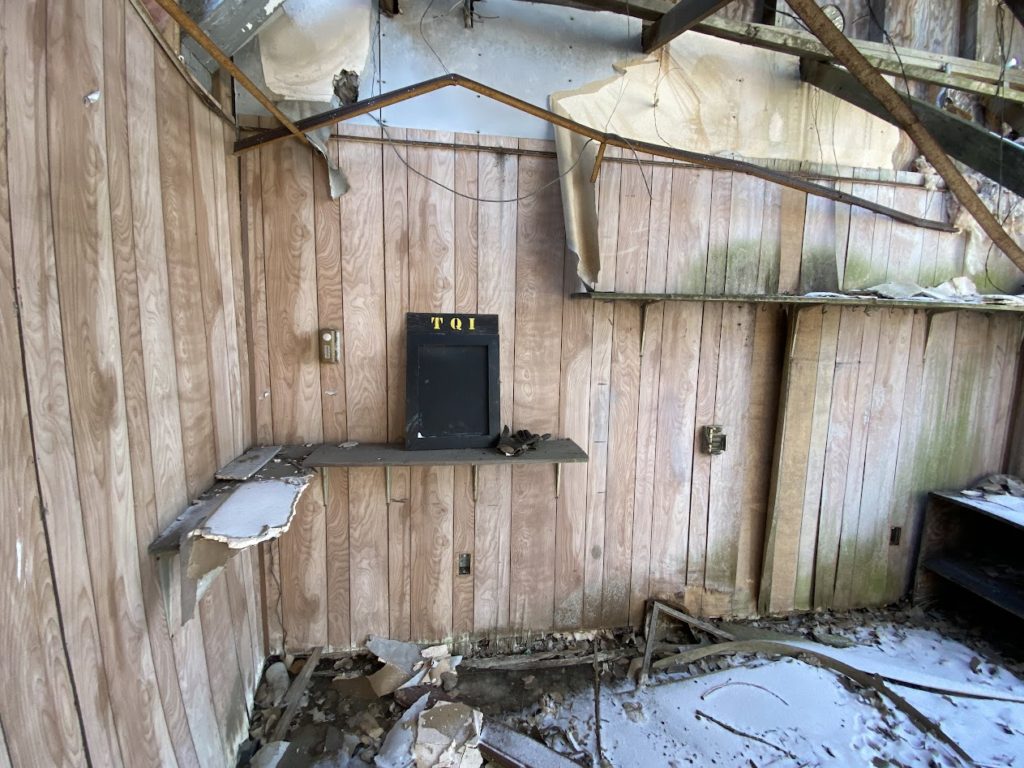
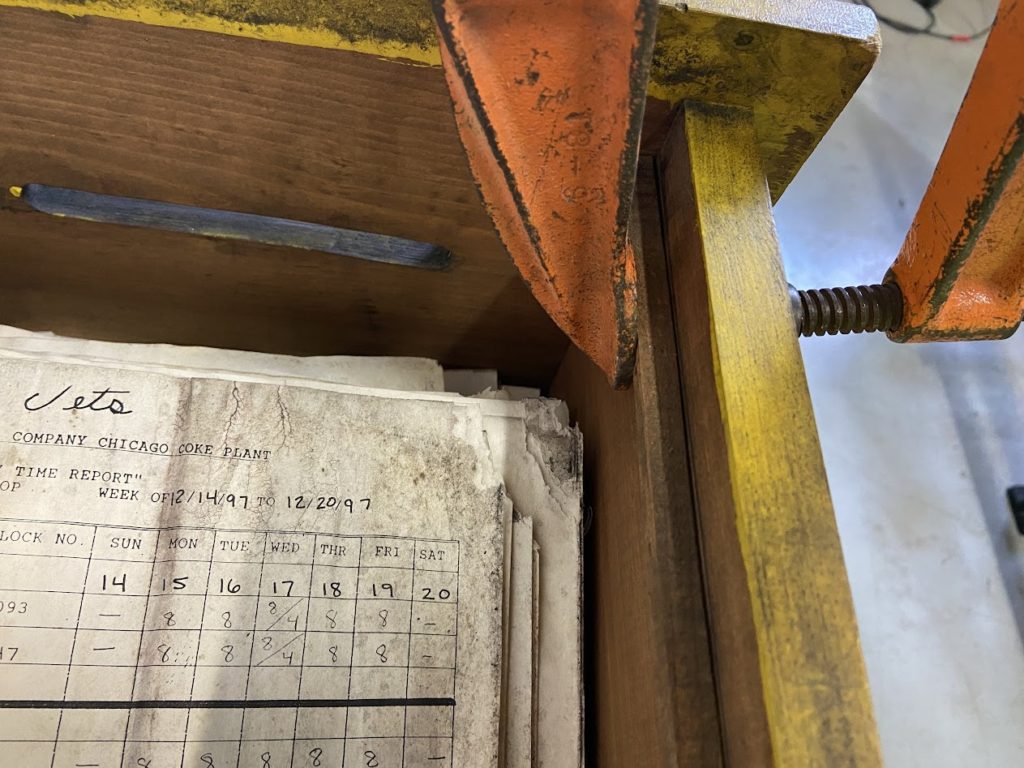
First up was the suggestion box I left behind in the coal bunker. This is located on the bench level, near the north end of the building on the other side of the bathroom wall. It is quite dark in there – I intended to shoot video of me removing it but I determined it would not come out very well.
This used some interesting fasteners. Threaded rod ‘studs’ (two of them) were screwed into anchors in the masonry wall. The inside of the box was drilled for two hollow bolts, with internal threads, and slotted heads. It offered no resistance and away I went. This box (like the first) had been pried open by an inquiring mind at some point in the past. But unlike the first which gave way on the right edge, this one actually cracked the door. I could tell at a glance that it was not a very clean break but there was no time to contemplate that now – a long journey was ahead before any repairs could begin.
Getting it down to the ground level was challenging. Normally I pack things in my backpack. This is far too large, but carrying it is impossible since I need both hands to climb down. I used the hook on my ratchet strap (in the slot on top; more on this below) to lower it down to the rubble below, then climbed down.
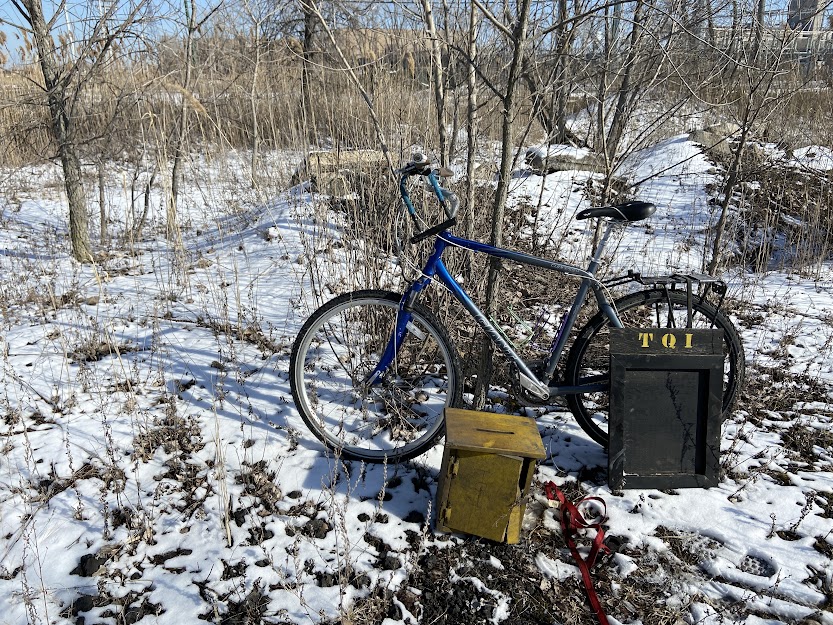
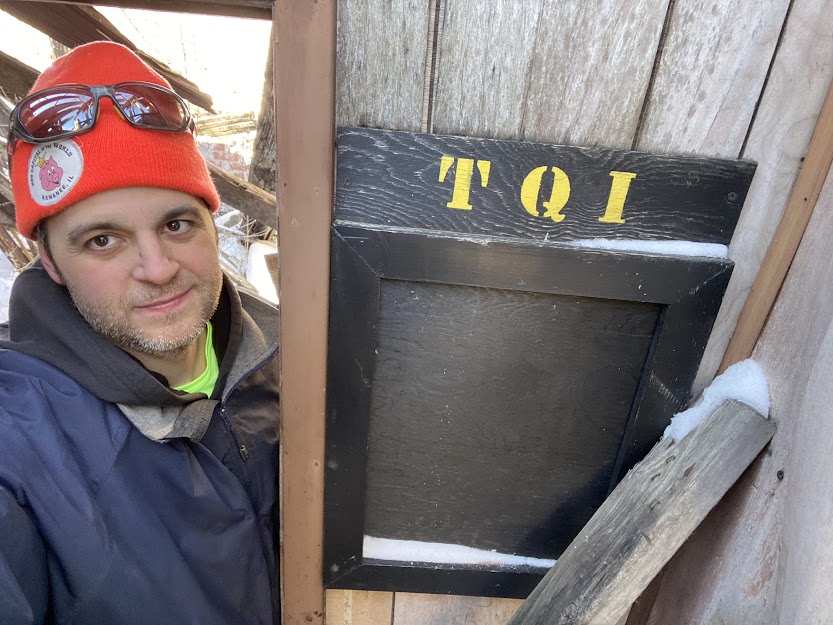
Next up was the second TQI board. This was located in the NE room, just next to the door, of the BP office. The NE and NW rooms have had their roofs collapse – the NE room is far worse for wear. It is not possible to go past the doorway at all. A huge 6″ square timber hangs just overhead, held aloft by the wall separating the rooms. You don’t want to be present when this decides to come down.
The first TQI board from the coal bunker was held only by two fasteners, through drilled holes in the top two corners. This one used deck screws sans pilot holes in all four corners. They were placed haphazardly with no measurable centers. I used my Phillips screwdriver to easily remove them. The 2×4 you see there is pinched by debris below, it did leave a bit of a mark on the board as it sat there for an untold number of years. Just more character for this item and another chapter in it’s tale!
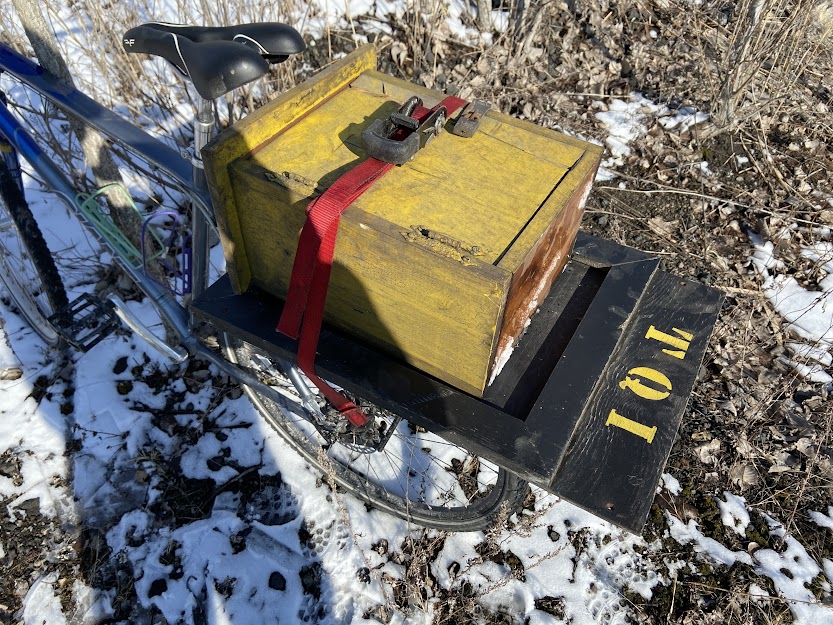
I carried the original issues of these two items both home via the rear rack on my bike, like so many other artifacts. The suggestion box took some outside the box thinking, as my bungee was not long enough. I used an endless loop of plastic strapping I found in the storehouse that day to extend the reach of the bungee and it held for the 3 mile ride back to 134th Street. The TQI board somehow was not too wide for my bungee to be effective so that was very straight forward cartage. But I knew that carrying both would be tough so I brought a small ratchet strap with me. Ironically I have brought this with me a couple times before but never been able to use it, as the load needs to be substantially tall in order to use the strap (all ratchet straps have a minimum length). It worked very well on this day!
Back in my workshop – I got to work. First up was the suggestion box. I used some lessons learned with the first one for order of operations. Like a paramedic cuts off your clothes with scissors, I needed to remove the latch and lock. This was 7 small Phillips screws. Then the lock went into my vice so a bolt cutters could open it for the last time. I also used the vice to flatten the latch which was badly bent by the violence it endured during the amateur safe cracking event it survived.
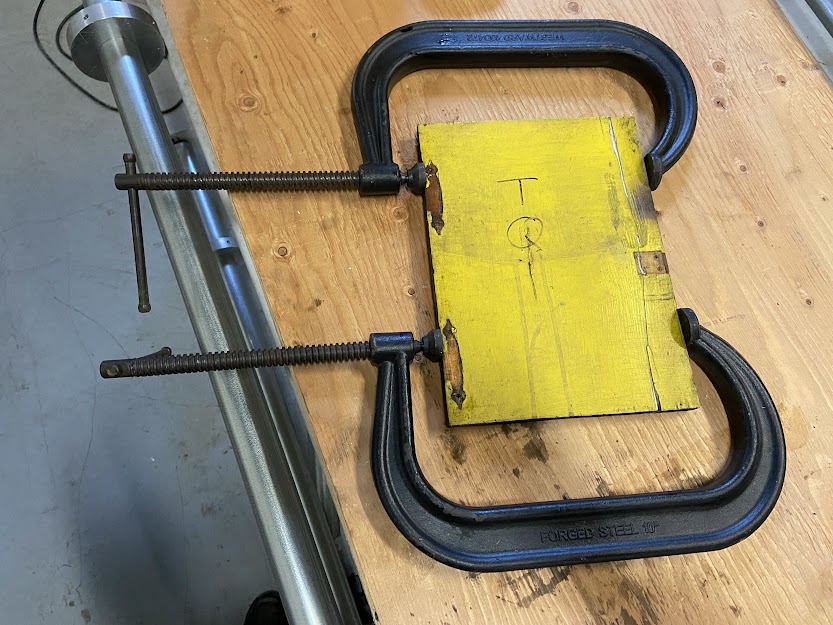
My clamp up for the break in the first suggestion box was feasible without disassembly because it was the side of the box. As it was now on the door, the hinges would need to be undone. The hinges also looked to have been bent so I removed all the screws and dug through my clamps for some large enough for the door. I was running out of options when I found these!
Certainly some splinters of wood are missing from the front and back but I got things pretty well aligned with a good dose of Hegewisch’s own Aniol supplied wood glue. Next, the hinges went into the vice just like the latch did – they were very bent. The results were good so I mixed up a bucket of Simple Green and water to wash down the cabinet. I was shocked to find probably 1/4 cup of coal/coke dust inside that made it through the long journey via bike and truck. The ShopVac came out and after soiling some rags with my soapy solution, it looked pretty decent. This box actually has a very appealing patina. The first box had some actual damage to the top, the paint was really degraded. This one sat in a dry environment, with 4 or 5 stories of solid concrete above, so no rain water could trickle down.
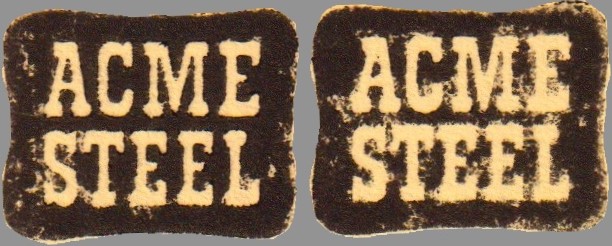
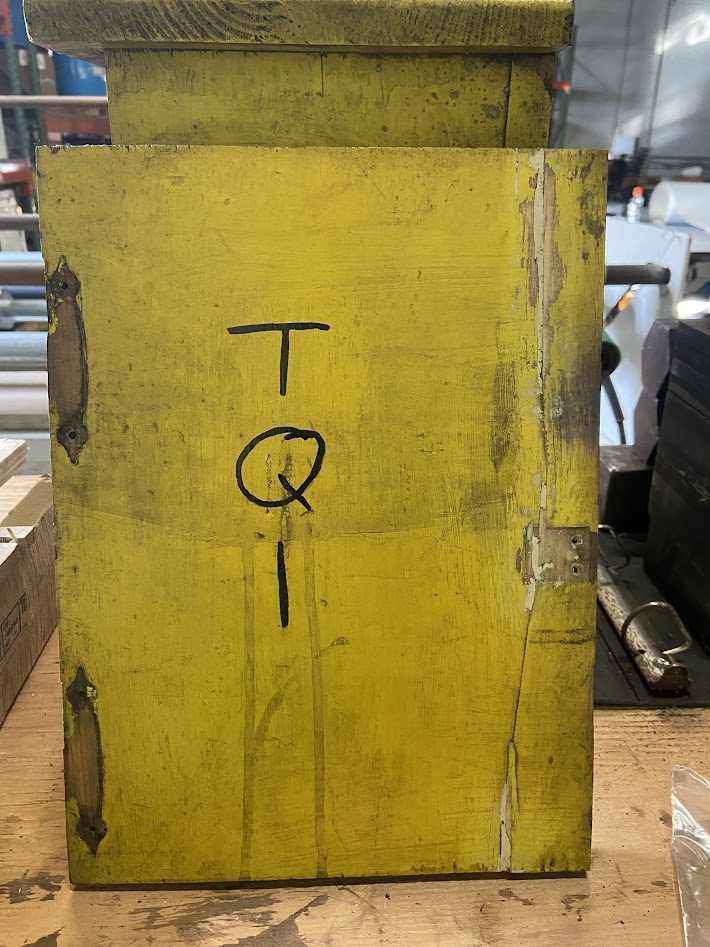
I was unsure if I wanted to repaint the box (yellow of course) or not, but while the glue dried I did apply some wood filler to the crack in the front which is deeper than these photos would tell you. I did take a Sharpie to go over the hand scrawled ‘TQI’ on the front both because it was faded, and also because if you are going to write the acronym the letters should be a bit thicker and easier to recognize! With all this done, I moved onto the TQI sign.
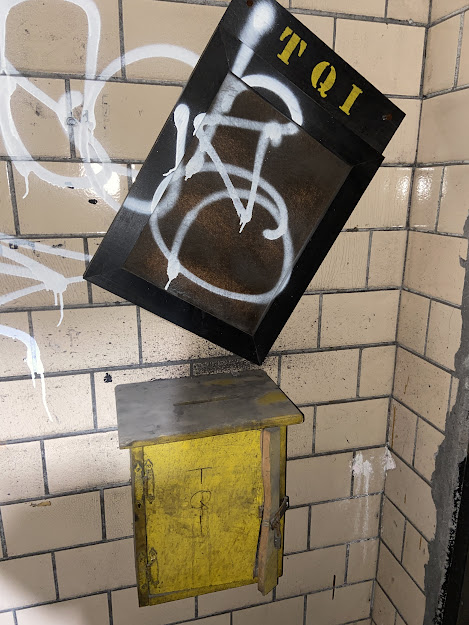
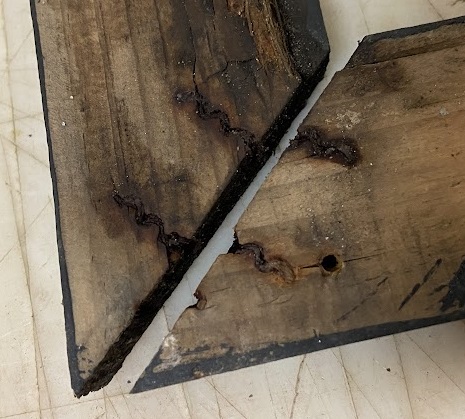
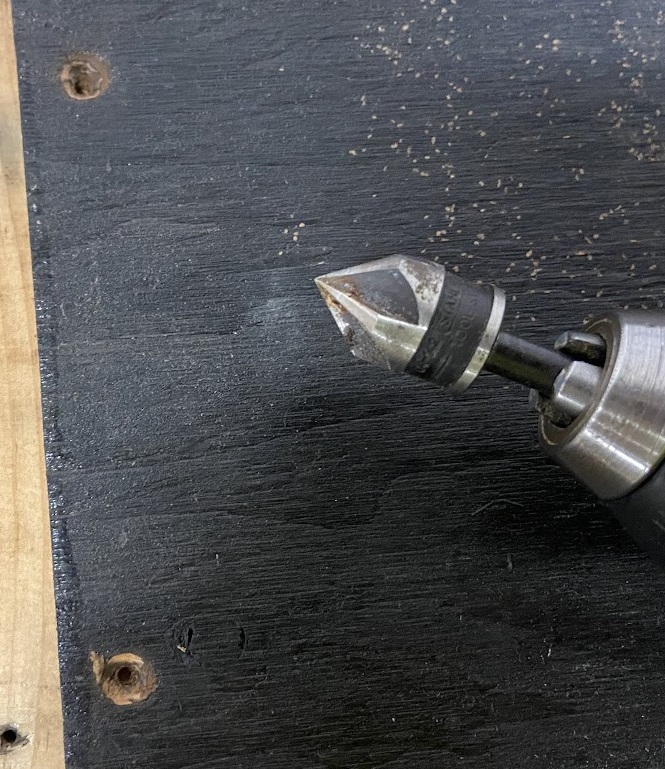
I learned MAJOR lessons with the first TQI sign. Now knowing about the coregulated fasteners hidden inside, I tread carefully. First I had to remove the seemingly dozens of (very rusted) deck screws from the back. Almost half of them were so rusted I could not get a screwdriver to engage so I picked at the wood around the heads enough that I could get the end of the jaws from a set of Vice Grips and remove them that way. Unlike the first board which refused to give up it’s frame even with all the screws removed, this one came away easily. I think it was only paint that held the first board together, but that one is in it’s final state and won’t be disassembled again, so an needless lesson. But with board #2, removing the frame revealed some disturbing gunk inside!
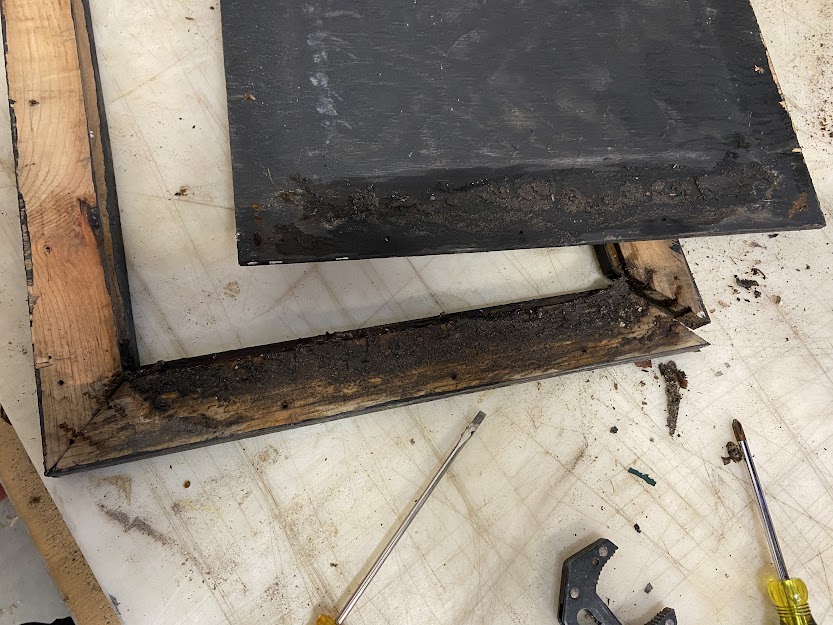
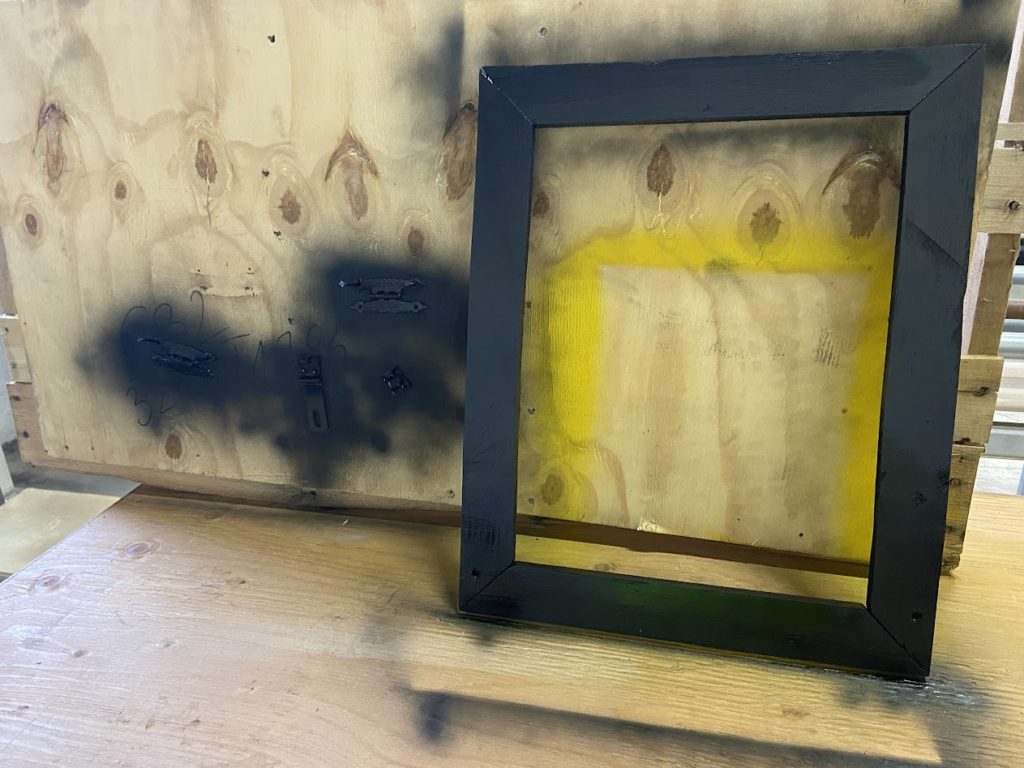
Precipitation had accumulated at the bottom of the frame along with dirt, no doubt whipped up by years of winds and together this mess sat, unable to flow or drip away. So over the garbage can it went with a scraper, then a dry rag to clean it up. There remained a small area of legitimate rot, but leaving this in a warm environment for a while should slow that enough that it can be ignored, as said rot does not show through to the front of the frame. I had a similar experience with scraping away wet, black gunk from my standing desk (where it sat on the earth for god knows how long) and the accompanying rot which time mitigated. As seen above, the coregulated fasteners in one corner are totally rusted away.
I still question the need or effectiveness of these fasteners anyway so no big loss there – the screws through the back hold it all together in the end. I may try to glue this joint once it dries out sufficiently but that will require some kind of interested clamping jig.
I decided that with this board, I would not deviate from it’s original use as creatively as I did with the first. So I found some cork sheet to fit and got that on order. The rabbet is 1/4″ so I got a sheet with matched thickness. I know the cork is very compressible so I was tempted to get 3/8″ but the price became prohibitive. I was also unable to find an effectively sized sheet to fit the odd dimensions of the frame so I ended up getting a 12″ x 36″ sheet. It is not tall enough, but it is almost double as wide, so I will have to piece a couple slices together to fill the frame. I got this for about $14 while the next larger size (4′ x 8′!) was over $100 so it was a sacrifice that had to be made.
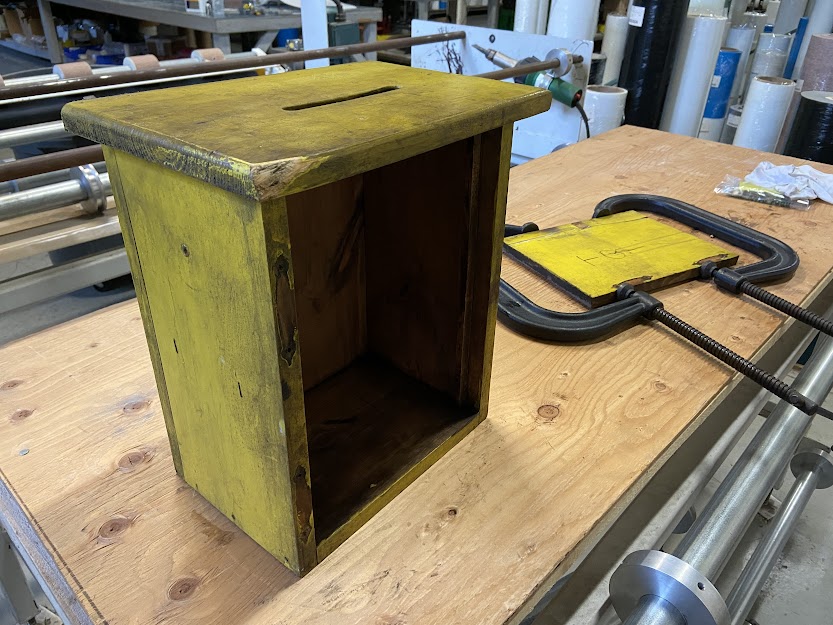
About 18 hours later I removed the clamps on my box – a very strong joint with excellent alignment, despite the missing material. I sanded off the excess wood filler, but still not going to repaint it quite yet.
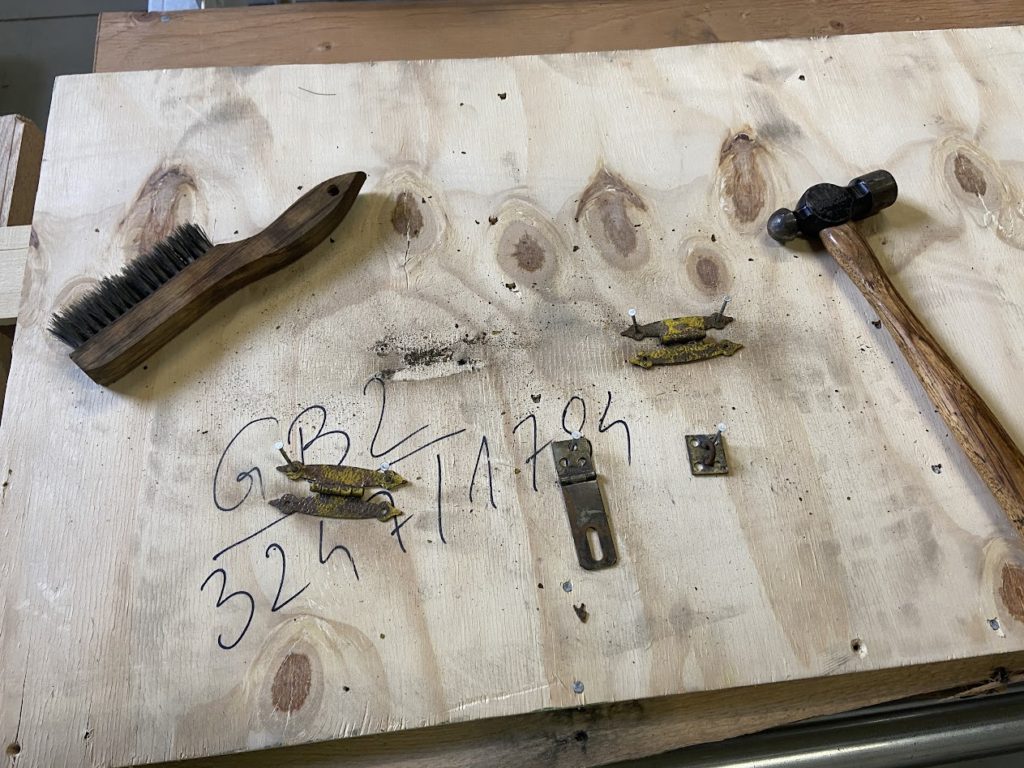
I really hate these hinges – the style is plain ugly. In order to make them more palatable I am going to paint them black. So I mounted them to a scrap piece of plywood and used a wire brush to get all the excess yellow paint (which appears to never have bonded very well in the first place) off. I decided I’d paint the latch and hook while I am at it. The ball peen was out to continue to bash these pieces back into shape. Whoever pried this door open did a real bang up job.
This small piece of wood keeps the door from closing too far inward and I noticed that it was coming loose – as a result of the prying activities that nearly destroyed it. Very difficult to swing a hammer in there so used a C-clamp in a few spots and heard a very satisfying creak as the nails went back into place.
After 18 hours the moisture is almost entirely gone from the TQI frame. I won’t have the corkboard for a whole day additional so it will benefit from the additional time. In the meantime, I tossed all the hardware from the suggestion box into a cup with some vinegar. The screws from the hinges look fine, but the latch hardware was rusted. The deck screws from the TQI board were way too far gone even for vinegar. I did save one so I can match it – they need to spin into the existing threads. Looks like I need seventeen (not counting the four in the corners, which I will not need) 1″ long with a coarse thread.

After much deliberation I did decide to rattle can the door – only the door. This seemed wrong from the beginning but I really love the patina on the top. Now I am glad I remarked the TQI and even made it a bit thicker, its faded out appearance actually works in this situation. I probably could have done a better job with the wood filler, and maybe I should have actually removed some additional wood as well, to make it easier to apply. But no turning back now, and the large voids are gone so it was still effective.
Back to the TQI board: had to get a box of 300 screws! Was about $8. I realize now that the screws are not countersunk on the back and this will tamper with my OCD. However the total thickness of the frame plus the backing board is exactly 1″ so if I countersink even 1/16″ there is the chance the tip might poke through the front. Well since the holes are already drilled and ‘tapped’, I can just grind the point off the screws. Much more satisfying.
I gave the hardware a coat of paint then decided I might as well hit the frame as well. For good measure I even sprayed the back of the backing board, the paint had degraded from moisture/precipitation (it will forever be a bit warped, but so am I).
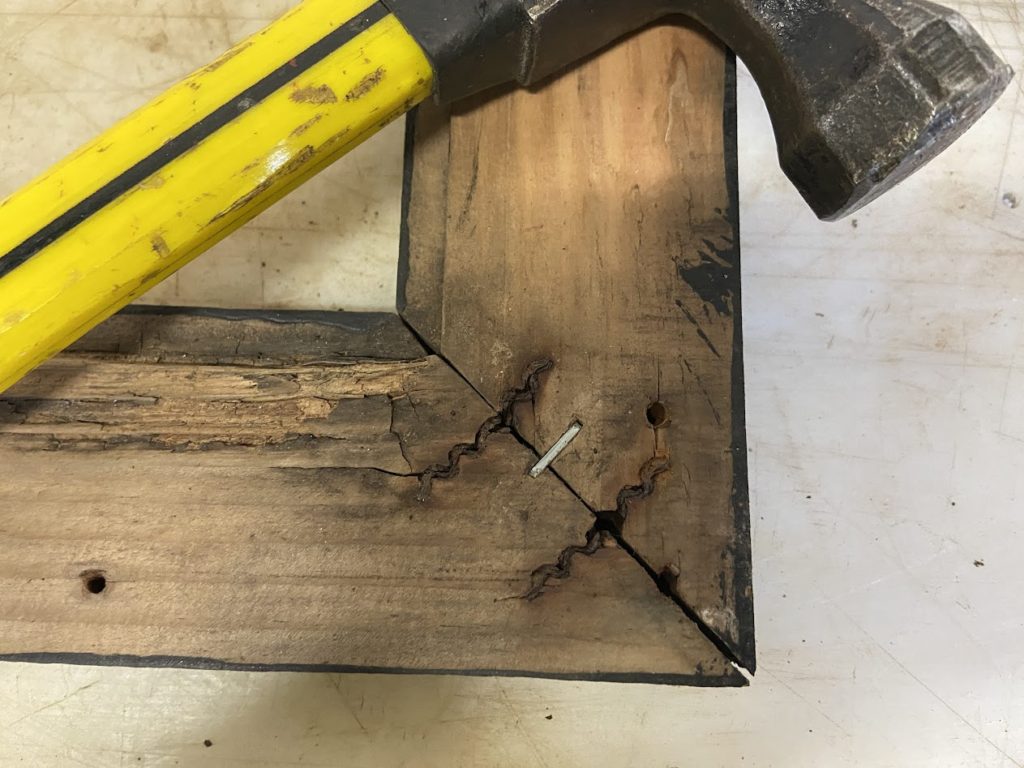
I decided gluing was unnecessary for this broken joint where the coregulated fasteners had disintegrated. Would be logistically difficult (to clamp) and also superfluous due to the massive amount of screws from the back holding it together. But I realized it would be difficult to assemble once I got the corkboard as it needs to sit in the rabbet, and I’d have to manually hold it all together (while upside down) when I want to drive the screws back in. I thought about a few ways to temporarily squeeze it together including duct tape, then the staple gun came a’ calling. One staple does the trick!
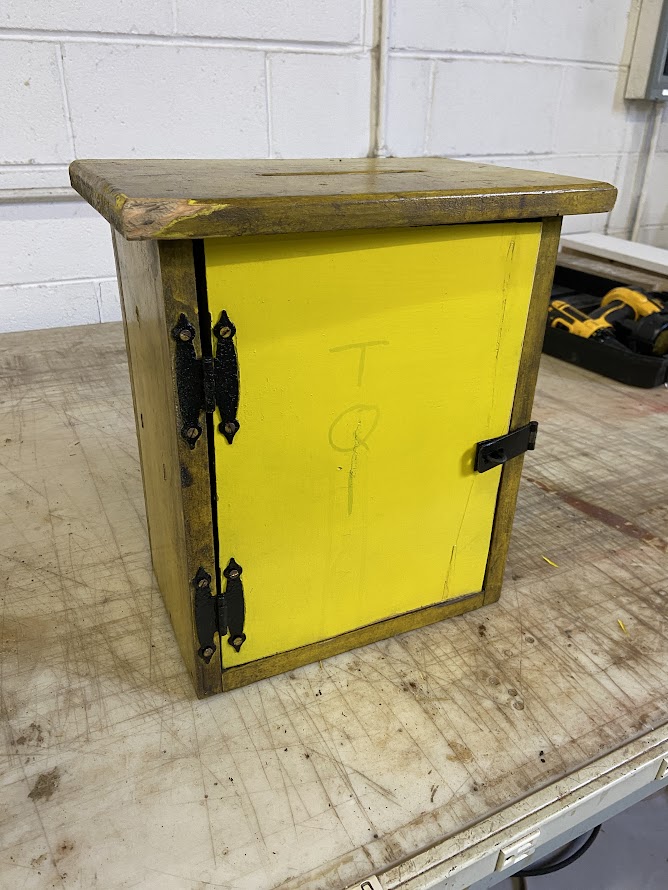
Once the paint on the hardware had dried sufficiently, I put it all back together. The hinges are permanently a bit out of alignment (even if flat) due to the event that rended it apart. So the door sat a bit oddly. Used a belt sander on two edges so that I could get it to open/close properly. But it seems like the door has a bit of a warp to it as well. Still, the latch does engage. I did go back after this photo was taken to reposition the latch and I used more wood filler for the hold mounting points. This piece is now complete – just need to complete the final steps on the TQI board…
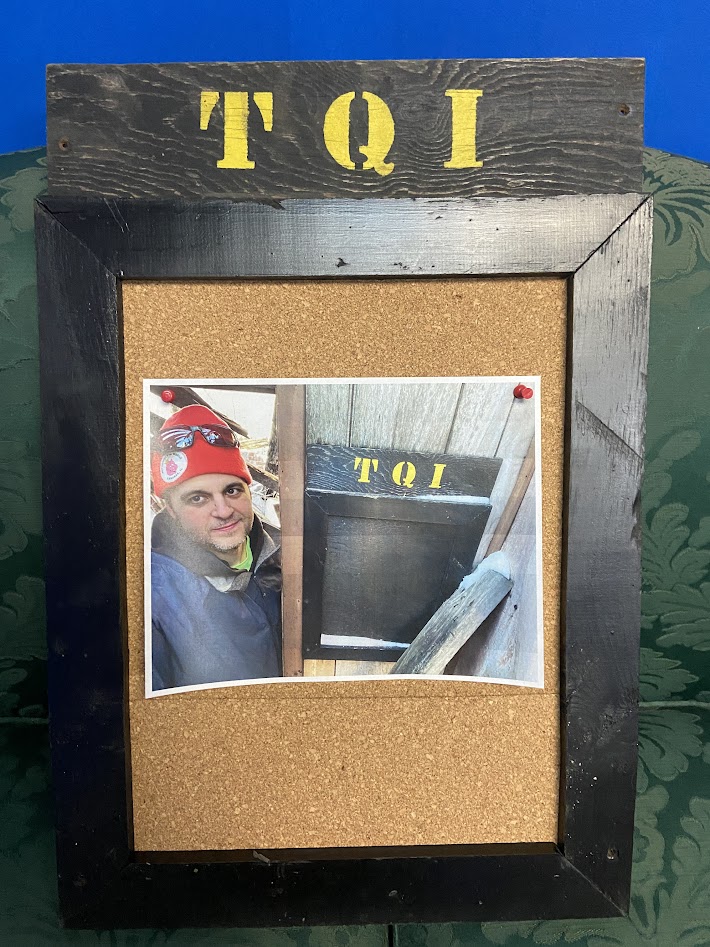
Cut the corkboard pieces and used some high quality duct tape on the back to hold them together. The tape doesn’t need to do too much work because the rabbet should keep it in place. I cut the pieces really snug so it would hold it tight, and looks like it did! Felt really good to put a new set of screws in the back – the countersinks are very satisfying. Another project completed!