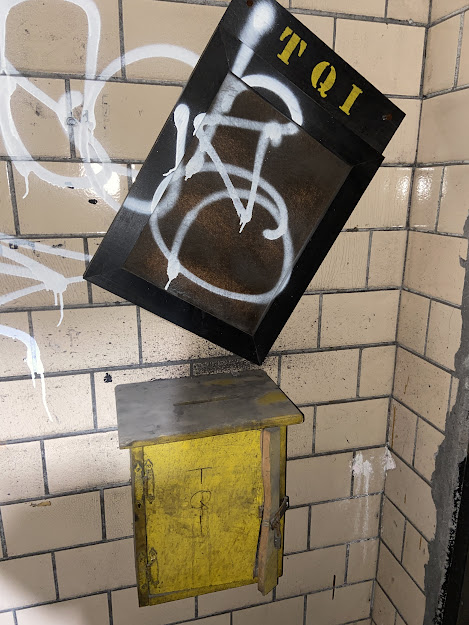
On January 15 2022, I was on what must have been my 35th site visit. I wandered into the coal bunker for the first time in months and came across this. Another yellow suggestion box! This one is also cracked open and ‘TQI’ has been scrawled onto the door. Above it is a bulletin board with the same acronym stenciled onto it. What is TQI?
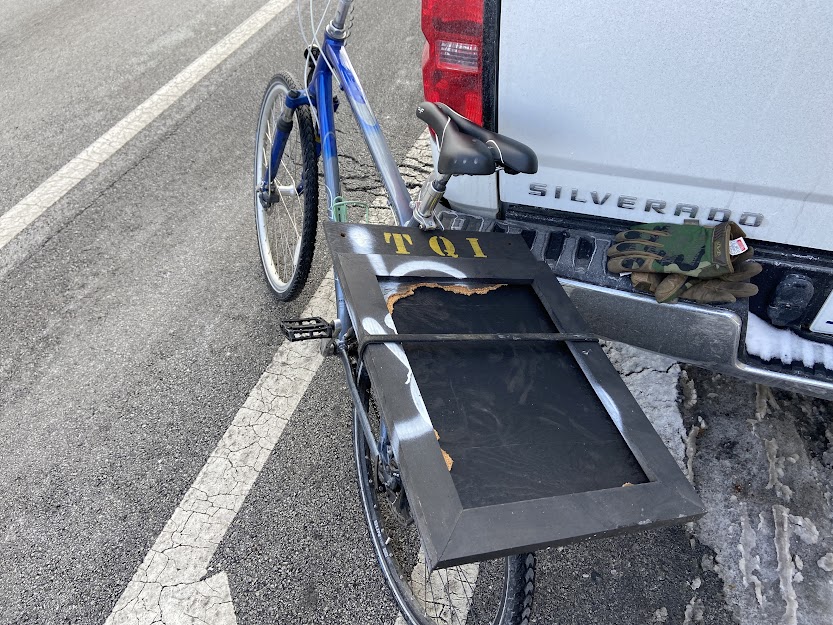
This is briefly touched upon in the oven department training video and it is self-explanatory. I was not 100% sure the use of this yellow box I found previously but this explains it. TQI is important to 1990s Acme culture – this is a historically relevant item that needed a new home in my museum! You have to love the yellow on black color scheme they went with to match the logo as well.
I’ve seen a couple bulletin boards but in both cases (inside gate house, and 10’ away, NE corner of coal bunker), the glass was smashed and contents long gone. The bulletin board was hanging by a thread. Two anchors had been driven into the brick but over time had gotten loose. A strong breeze could have knocked it loose from the one that remained. I unscrewed the bolt from the anchors by hand and left them behind and made my way out of the bunker, and out of the plant. Headed back to Hegewisch, and then home so that the restoration could begin.
The item consists of a piece of plywood with a miter cut frame which holds corkboard in place. The corkboard had swelled up and was bulging out of the frame. Also, someone had added some sloppy graffiti to the item. Luckily, the majority of it was on the corkboard, which needed to go no matter what.
First I removed what I could of the corkboard with a knife. It seemed that the margins were secured underneath the frame. A look at the backside shows many drywall screws which hold the frame to the backing. I removed them, hoping I could then remove the frame but it was nothing doing. At first I thought that the paint had attached the frame, but I think it might be actually glued on because I would not budge even when I tried to coax it with a screwdriver as pry bar. Not wanting to damage it, I gave up and replaced the screws. I used a utility knife to slice off the edges of corkboard that remained but then realized it was NOT under the frame. There is actually a small rabbet at the edge of the frame and the corkboard (there were actually two layers, I should mention) sat inside this. With a screwdriver and some work I was able to pull all of the remnants out.
I needed to deal with that graffiti but I also needed a plan with what to do with the item itself. I could get new corkboard but it would be difficult to install without removing the frame which I had already sort of given up on. It was also impractical since I figured that whatever documents I mounted, they would be permanent. I imagined that there might be some inspirational message from the corporate levels of the company, to try to influence workers to make suggestions. I did not have such a thing, but I had a few ideas of how to make one.
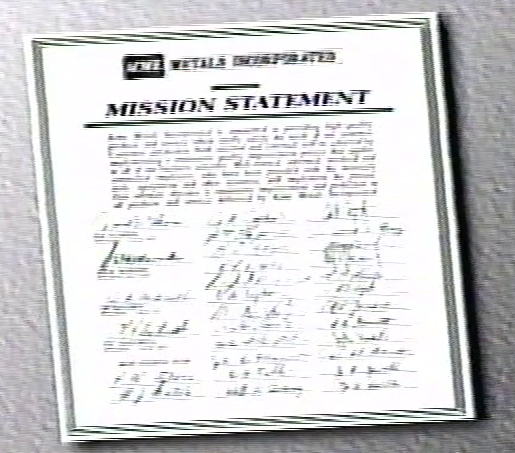
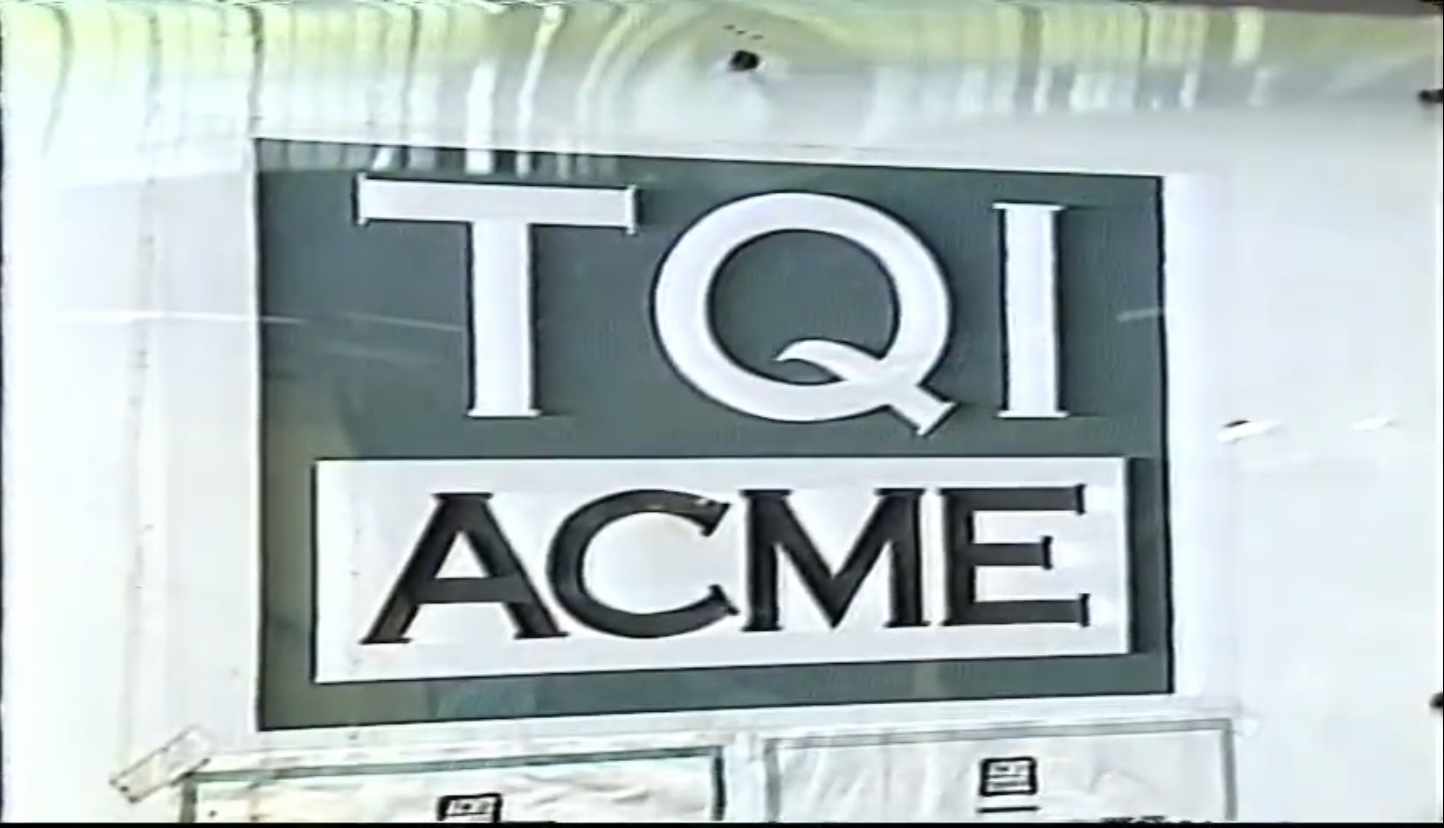
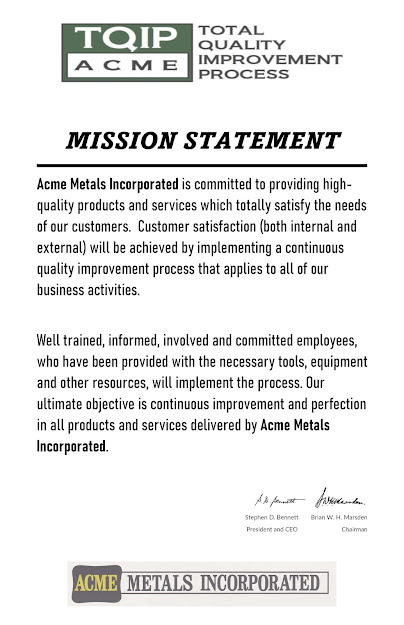
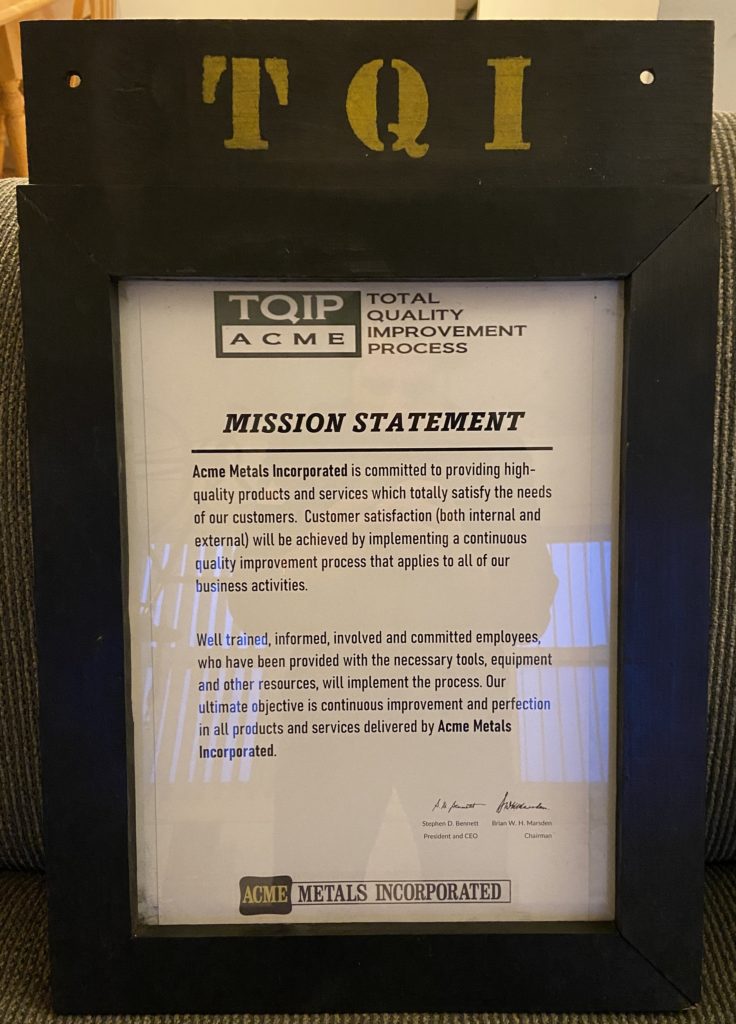
Again, back to the video: a mock-up is flashed across the screen just before the voice over reads a mission statement. The statement does not reference TQI directly, but this is just after that premise is explained (and the sign at the plant is shown, presumably mounted to the exterior of the main office). This seemed like an appropriate thing to use, but I’d have to make my own.
Starting from the top, the Acme Metals logo would be a must. I knew I had a high-res version of that which I scanned from some old Acme newsletters. The actual text of the mission statement I could easily transcribe from the video, but I have that already on a document as well.
At least half of the document is signatures, no doubt from various members of the board at Acme Metals. I wasn’t interested in giving them so much space on the document, plus I didn’t have those signatures anyway. But I did have a couple!
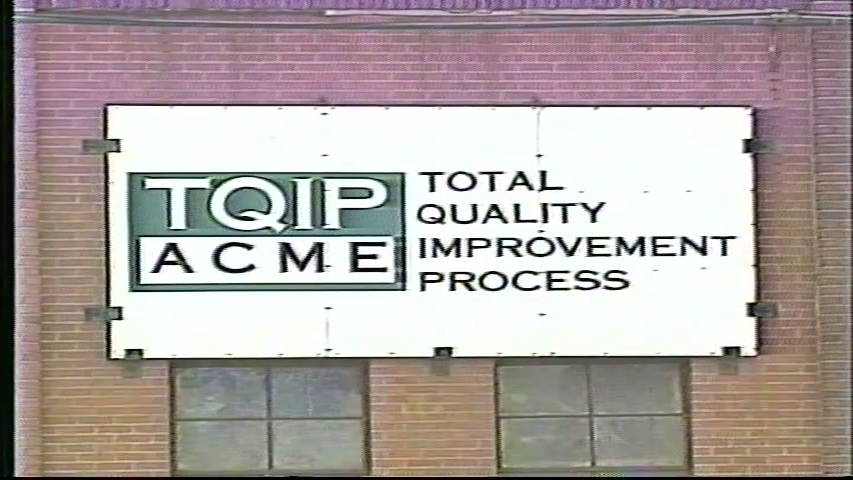
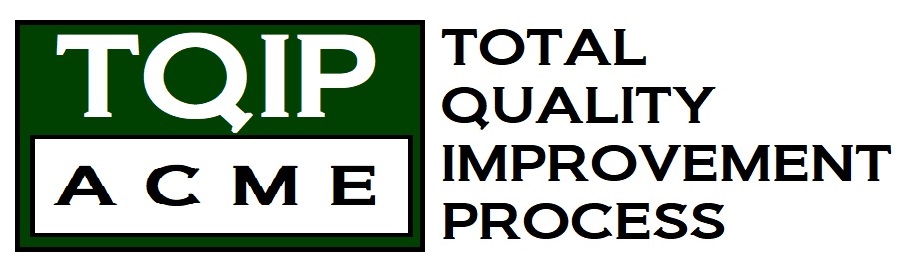
I wanted to incorporate that TQIF logo but the screenshot was very grainy. So I started over and re-built it from scratch in MS Paint.
I got the whole thing put together and used my two logos for the header/footer. They looked way too clear and concise. I experimented with a few apps (on both desktop and mobile) to take care of that but in the end I just used the available tools in MS Word. I also purposely distorted the logo a bit by not respecting the aspect ratio. Perfect!
The frame is 12″ x 16″ so basic printing on standard paper wouldn’t cut it. After finishing the entire document I realized this and had to change the layout and tweak everything to fit. I laid it out on ledger/tabloid size paper. This is 11″ x 17″ so it would be a bit tall. With some work I was able to get a measure on the rabbet at 1/4″. I printed with 1″ margins all around so I’d have to trim some of the dead space at top/bottom. The width was another issue, it would be too narrow so I’d have to use some white matting.
It was at this point that I realized I really wanted to use acrylic over this, which meant that I would HAVE to get that frame off one way or another. I only had to get one side off so I could slide everything in but this assumes they did not glue the miter’d joints. I did notice the right side had a small gap at the plywood so I carefully began to pry. Using so many screws made me think that nothing was glued, otherwise there would be no need for them unless you were using them as the clamping mechanism while the glue dried.
So I removed the screws on only the right side and started tapping a screwdriver underneath. This worked fine and the frame lifted but the miter joints did not open up. Were they glued? If they were and I continued, I’d explode the whole thing like a stick of dynamite. I was waging war with this thing and could not wrap my head around what the problem was. Finally – and carefully – I got it apart and found my answer.
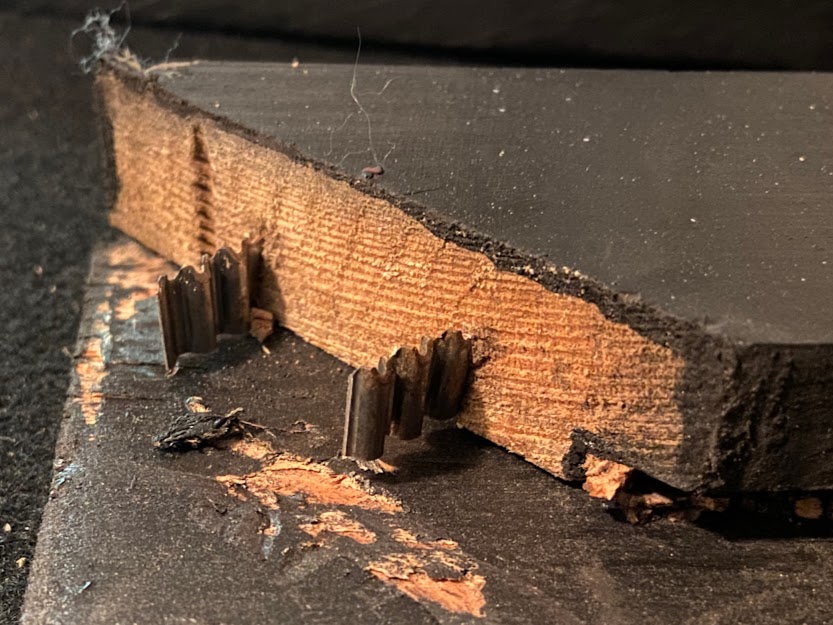
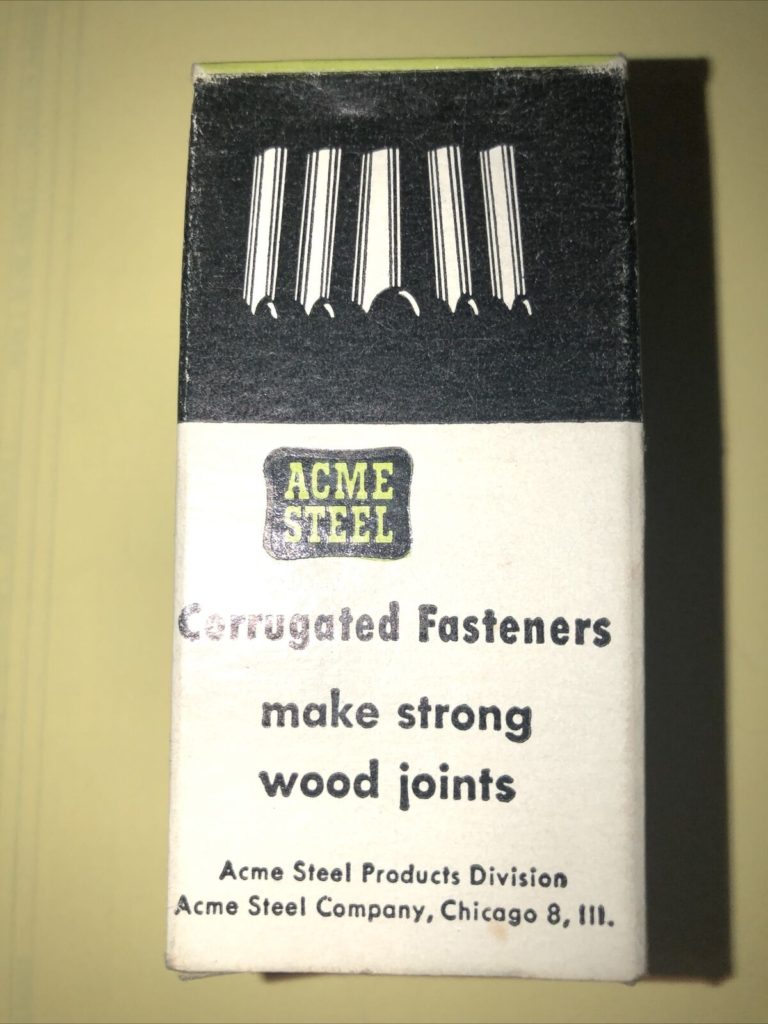
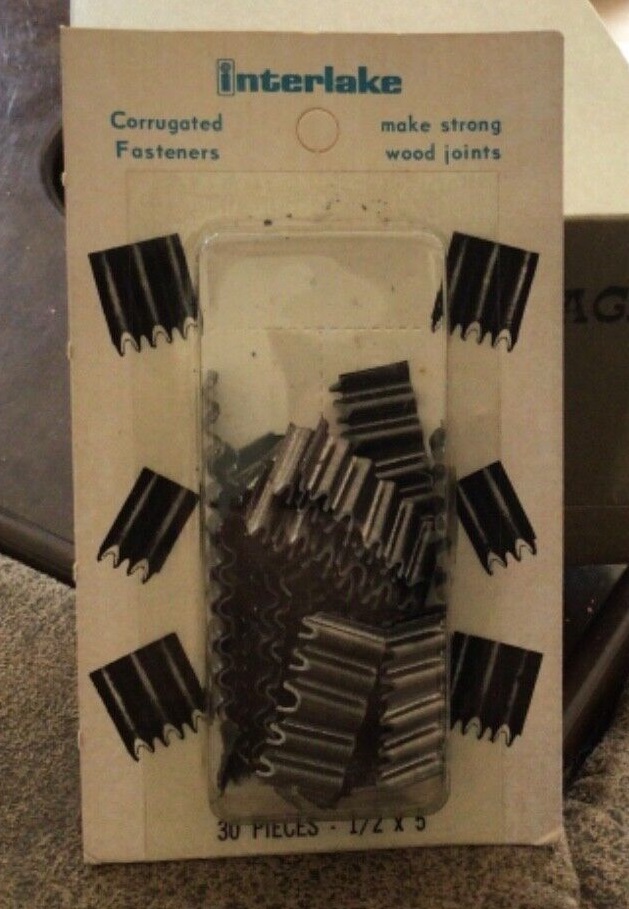
Corrugated fasteners! Well they did their job. How I did this without cracking one or both boards I have no idea, but I did. I could not help but wonder if they were Acme brand – I have seen these come up on eBay many times.
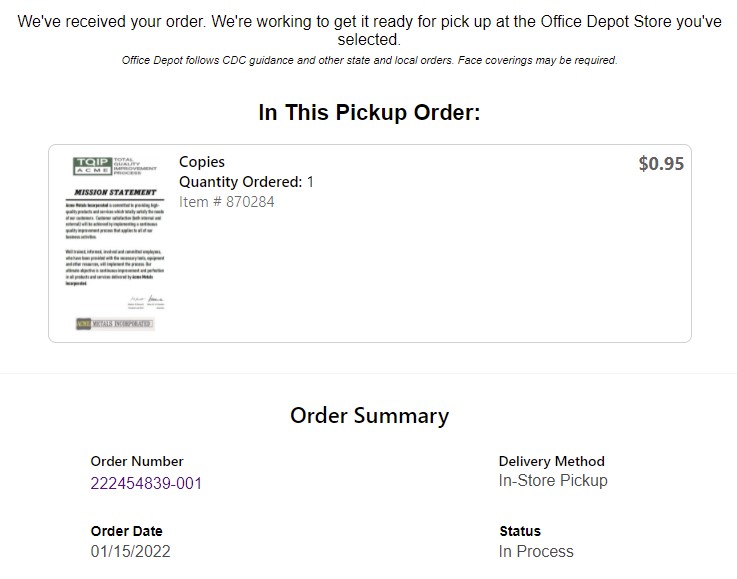
I wanted to use FedEx Office to print the document but they were closed and they are not open on Sunday. No way I wanted to wait to finish this project! I tried to convert the finished PDF to an image so I could have it printed at Walgreens but they can’t print this large, it would have to be shipped in. Again – would not work. Then I found that Office Max (who is open on Sunday) could do it. So I sent them 95 cents via Paypal for my document printed on 110lb paper.
In the meantime I could try to tackle the graffiti. I knew I could paint over the graffiti on the frame. If the shade of black was too dark it wouldn’t matter, I could just do the entire frame. But I could not do the entire item, because I can’t paint the top where the yellow TQI is stenciled unless I was insane enough to try to tape over the letters. Hmmm, I’d have to think about this one. In the meantime I went off to get a can of spray paint for the rest.
I came back from Menard’s with my paint as well as an 18”x24”x0.08” acrylic. I even found a knife for $5 that claimed it would score the material sufficiently that it would crack. I questioned if it would do any better than a utility knife but for $5 it was a worthwhile experiment.
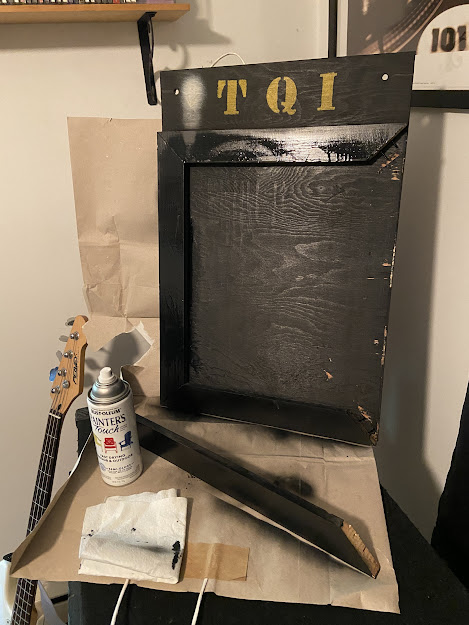
I considered not even trying to paint over the white sploth of paint above the frame but I was weak – I couldn’t help myself. I had to tape off the ‘TQI’ and of course this left a line. Only solution was to do the same on the other half so at least it is symmetrical.
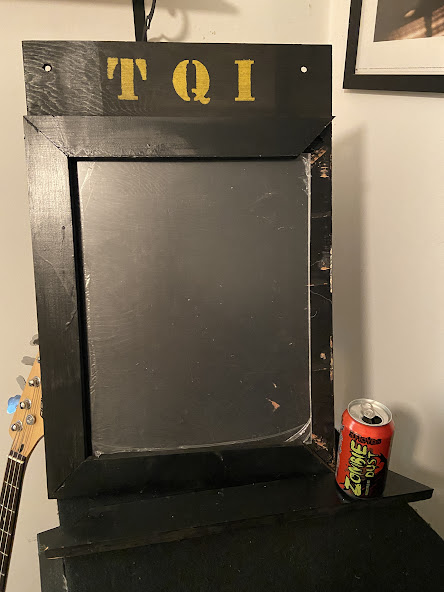
As for the acrylic it went pretty well. I cut it at with an extra 1/2″ in either dimension to account for the rabbet and it slides in nicely. Tomorrow I will get the matting and of course the printed mission statement and this shall be done!
Office Max opened at 10am and by 1pm I still hadn’t gotten a call that my print was ready. I called them – and literally got the email while I was on hold. What are the odds?
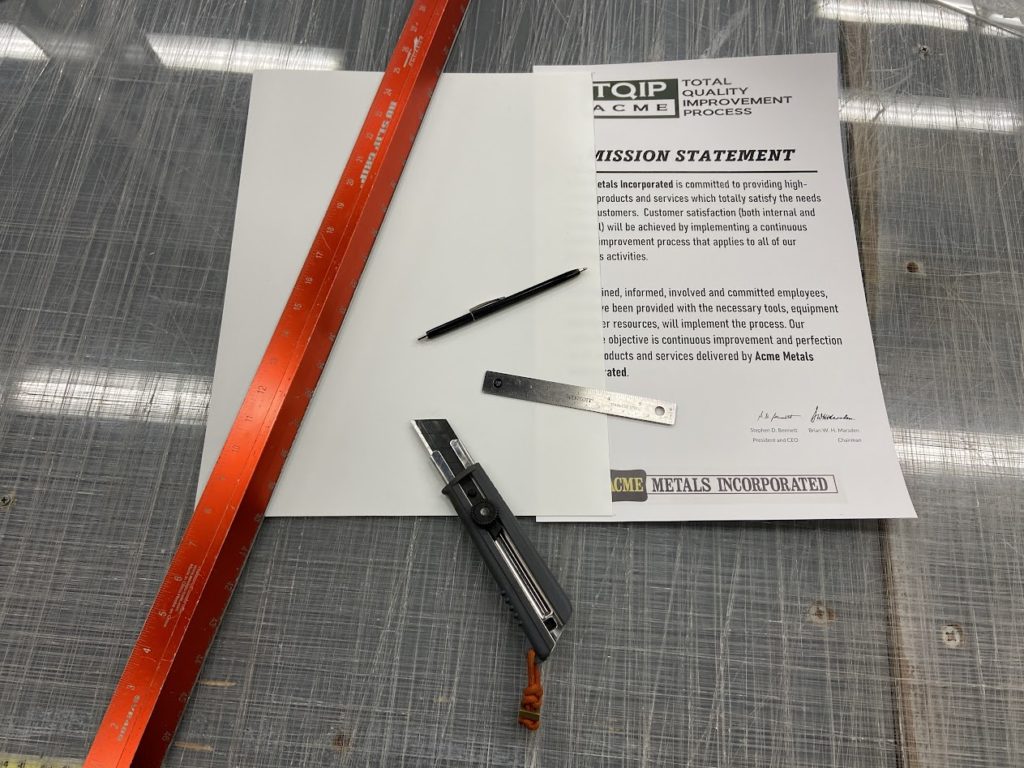
I cut my matting to the same dimensions at the acrylic. Now I needed to trim the print itself, as it is 1/2″ too tall. I figured this would not be a problem, since I created the document with 1″ margins so they should be plenty of dead space to cut away.
But either I screwed something up, or Office Max did – the margins are NOT 1″. This is a problem – keep in mind I will lose an additional 1/4″ on all edges inside the rabbet. I started making measurements and saw that the bottom Acme Metals logo would be right up against the frame. If I miscut by even a millimeter, part of it might be hidden inside the rabbet. Not acceptable! I had a bit more space (but still not 1″) on the top margin so I started trying to do the math to figure out how to cut it a bit off center and get some space back at the bottom. This was making my brain hurt so I simply took the matting and used it as my guide to make marks and then trimmed away what I needed to.
I needed to attach the print to the matting as well, since the matting is wider. This again required some very careful measurements. I knew there should be 3/4″ on the left/right sides but even though I used a framing square when I trimmed, something was out of wack. So again, I gave up on making measurements and just did it by eye, and trimmed off another hair of the print on top and bottom.
My measurements (or lack of) worked perfectly – margins are nice on the finished product! It went together in an instant. I used a small block of wood brace the hammer blows to put the frame back together again. I couldn’t figure out why the miter joint didn’t seem as tight this time when I remembered that I had to replace the screws! When I did, I saw that everything had shifted, and I had just tightened down the frame with the matting and print shifted and pinched under the frame instead of inside the rabbet. So I had to loose then, knock it back to center and tighten one more time. The last time no doubt!
Although I cleaned it inside and out apparently there was some coal/coke dust lurking in the rabbet and I worked it free as I slid everything into place. If you look closely you can see it in the corners. This was a bit distressing but I decided this is as authentic as it gets. I have not yet hung it because I cannot decide where. Also not sure of the means I will use. It is so lightweight a sawtooth hanger would be sufficient but I’d like to use the original mounting holes if possible. Time will tell. For now I am just satisfied it is complete.
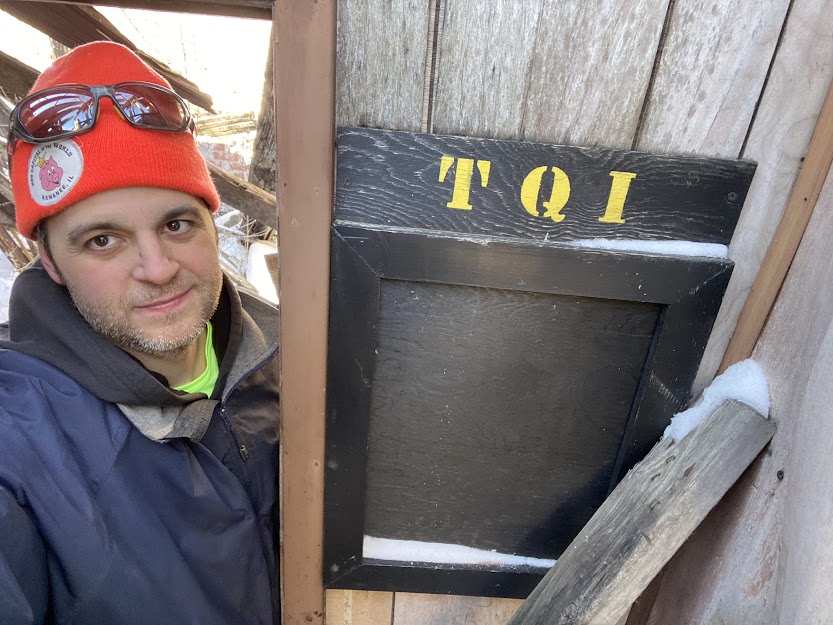
[ADDENDUM: During a site visit on 2/19 I was investigating the BP office. I have been thought this building countless times. The entire northern half of the building (which consists of two rooms) is inaccessible due to roof collapse. The NE room is especially impacted. Despite this, I did my best to squeeze inside and I found the below just to the left of the door. I am most curious about the contents of the frame. As I know from the TQI board I removed from the coal bunker, once upon a time this held corkboard and probably some documents held with thumbtacks. No doubt the corkboard disintegrated and fell to the ground. Currently due to snow and ice, I cannot investigate too deeply, but perhaps some documentation is buried under the fallen timber. I’d agree this is unlikely except that I have located hundreds of documents stored in similar conditions which date back to pre-1940.]
8 replies on “TQI Bulletin Board”
Great job on the restore. If I were a former employee I bet seeing this would really take me back.
Thanks very much! It was a lot of fun
Toggle bolts with heads matching original bolts. I’m assuming by what you described they used 1/4” lead anchors with 1/4” hex bolts.
They weren’t toggles, some kind of expanding anchor for brick.
Yes I understand they were AJs. But to simulate the bolt heads only and since you probably gave drywall use 1/4-20 toggle bolt to set a hex head bolt
Not a bad idea!
We used a lot of of Ackerman Johnson’s aka AJs’ in the mill , drilling the whole by hand with a hammer and “star bit “ it was barbaric ! Hahaha
Hammering with a drill bit! That’s a new one!