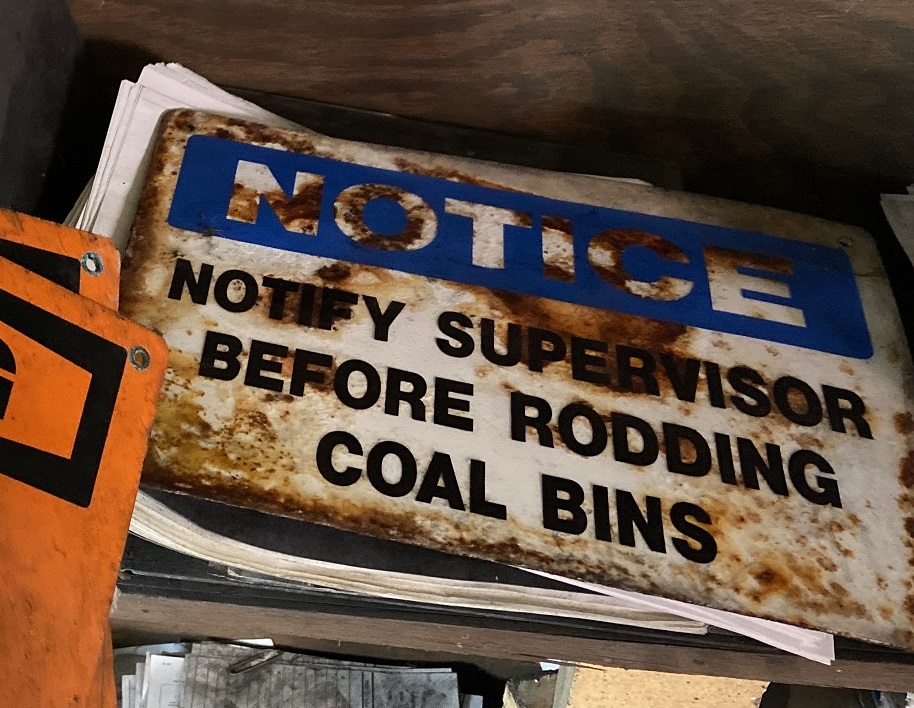
This sign was a real mess. Unlike all the others I have found, this one showed some serious corner cutting to save a few bucks. The backing is a painted steel plate. But the lettering is just attached to a cheap transparency which was somehow adhered to the steel.
It wasn’t adhered very well, that is for sure. Nor would I expect it to be when the surface is painted. And I don’t know how many adhesives will stick to a slick piece of mylar like this anyway. At any rate it failed, and moisture got behind it and ate through the paint and rusted it badly as you can see above. This also left rust residue all over the transparency.
I deduced most of this as soon as I found it, but I tucked it in my bag so it could be dealt with later. Fast forward a few hours and I sat down to figure it out.
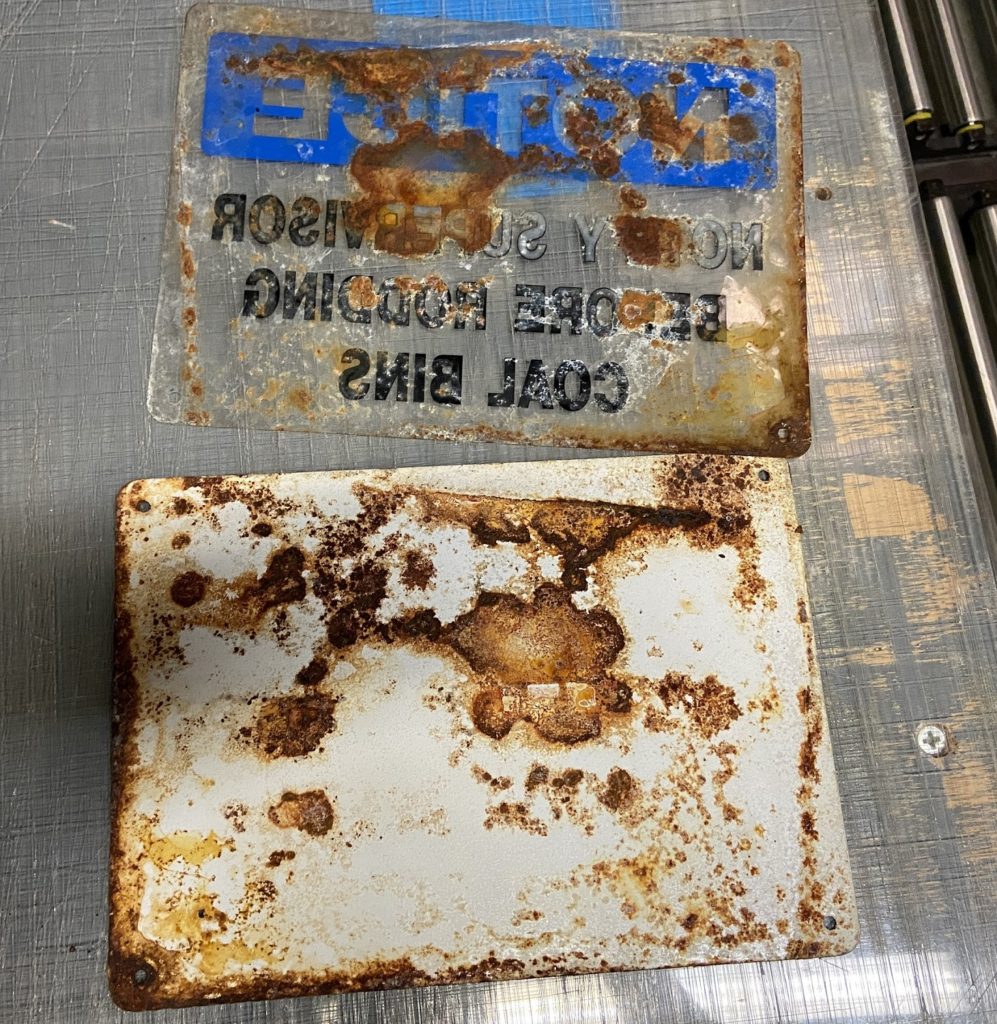
When I removed it from my bag I saw that it was truly hanging by a thread. Like an old scab, I couldn’t help but to just tear it free. It didn’t put up much of a fight and then I just kind of stared at it.
I knew I’d have to put some serious elbow grease into getting the rust off of the steel plate, but how far would that go? I’d have the same problem trying to find a spray adhesive to glue it back down. And I’d probably tear up the white paint getting the rust removed, but the paint is very necessary to give contrast to the lettering on the transparency. What a bad design!
I had trouble with it, I really did. But I decided while it might not be original, to just trash the worthless piece of steel. So into the dumpster it went.

So I cut a thin piece of plywood I had laying around with my circular saw and then used some double stick tape to attach a piece of fabric backed white polyurethane (which I had cut to size). The tape wouldn’t hold forever but I didn’t need it to.
I cleaned the transparency top and bottom as best as I could. Plenty of rust was refusing to budge but I worried that more elbow grease would damage the medium. But anyway, it felt good to leave it ugly and real. So I called it a day before long and moved forward.
The Mylar had holes in the corner which matched up with holes drilled in the steel plate. I looked through my supply of nails and found some short nails with big heads – larger than the perfs in the Mylar. So I simply bashed four nails through there and right into the PU and plywood. As such, the Mylar isn’t attached to the backing but who cares? This will only ever hang on a wall for the rest of it’s life. You’d be hard pressed to break it free even if you tried, and I don’t see anyone trying, ever.

I’ll take it! I still feel a teeny bit of guilt for replacing the backing but it just didn’t make sense to repair it and limit my options for putting it back together. I had to use an angle grinder to cut the ends of the nails off (they were too long for the plywood’s thickness) but a few sparks never hurt anyone (unless they were soaked with gas).
Another great piece of history and a fun (and quick) restoration.